")
One of the things that makes testing the engine compression on the 1.9L engine in your 1991-1996 Ford Escort or Mercury Tracer is that the spark plugs are pretty accessible and can be easily removed.
In this tutorial, I walk you through how to run the compression test —and just as important— how you interpret the results.
I'll also explain how to run a wet compression test to see if worn piston rings or valves are behind a low reading on one or more cylinders.
I've laid out every step in a clear, step-by-step sequence, so you can quickly pinpoint whether a low or 0 PSI compression issue is causing a cylinder misfire or an engine no-start problem.
Contents of this tutorial:
APPLIES TO: This tutorial applies to the following vehicles:
- 1.9L Ford Escort: 1991, 1992, 1993, 1994, 1995, 1996.
- 1.9L Mercury Tracer: 1991, 1992, 1993, 1994, 1995, 1996.
Symptoms Of Low Or No Cylinder Compression
From my own experience, I can tell you that compression problems usually show up in one of two ways:
- Engine no-start condition: The engine cranks over but it doesn't fire up and start.
- Cylinder misfire or rough idle: Low compression causes the engine to misfire or idle rough, but as soon as you press the gas pedal, the problem disappears.
If the engine starts and runs but there's still a compression issue in one or more cylinders, you'll notice one or more of the following engine performance problems:
- Engine 'misses' at idle but 'miss' disappears as you accelerate.
- Rough idle that disappears when you accelerate.
- Cylinder misfire setting one or more of the following codes (1996 OBD II only):
- P0300: Random Cylinder Misfire.
- P0301: Cylinder #1 Misfire.
- P0302: Cylinder #2 Misfire.
- P0303: Cylinder #3 Misfire.
- P0304: Cylinder #4 Misfire.
- Check engine light is illuminated with a MAP sensor trouble code (even tho' the MAP sensor is good).
- Blue smoke coming out of the tailpipe.
- Bad gas mileage.
With this info under our belts, let's head down to the next subheading and get testing.
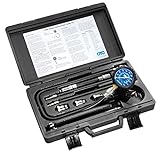
Which Compression Tester Should I Buy?
There are lot of engine compression testers to choose from and many places to buy them. I'm gonna' make some recommendations to you:


Disclosure: As an Amazon Associate, I earn from qualifying purchases. Buying through these links helps support this site at no extra cost to you. Thanks for your support —it really means a lot!
TEST 1: Dry Compression Test
")
Alright, before you get started, let me pass along a few important suggestions that'll save you some headaches:
- Label each spark plug wire with the cylinder number it belongs to.
- Use spark plug wire pullers to disconnect the wires.
- Always remove the spark plugs from a cold or completely cooled-down engine.
If you just yank the spark plug wires off the plugs by hand, chances are one or more wires' metal terminal will separate from the wire and stay stuck on the spark plug. Yes, you can crimp that terminal back on, but it's a hassle you're better off avoiding in the first place (by using spark plug wire pullers).
If you don't have the spark plug wire puller, this is the one that I use and recommend: Performance Tool W80519 Adjustable Spark Plug Boot And Wire Remover (Amazon affiliate link).
About removing the spark plugs from a cold engine, this is important because if you remove the spark plugs from a hot engine, you risk stripping the spark plug hole threads in the cylinder head. Believe you me, this is a nightmare you definitely want to avoid.
OK, time to get your hands dirty:
- 1
Disable the ignition system by disconnecting the ignition coil from its electrical connector. This will prevent the ignition coil from sparking during the test.
- 2
Disable the fuel system by removing the fuel pump relay. Disabling the fuel system will prevent fuel from being injected into each cylinder when the test is performed.
- 3
Remove the spark plugs.
NOTE: When removing the spark plugs, be careful not to drop any of them on the floor, or you run the risk of having the spark plugs porcelain insulator crack and then you'll have a misfire on your hands. - 4
Thread the engine compression gauge into the spark plug hole for the #1 engine cylinder.
NOTE: Hand tighten the compression gauge only! Do not use any type of tool to get it tight. - 5
Have your helper crank the engine till the needle on the compression gauge stops climbing.
- 6
Record on paper the value at which the needle stopped and the number of the engine cylinder on a piece of paper.
- 7
Release the pressure on the gauge and repeat steps 5 and 6 one more time.
- 8
Check the compression of the remaining cylinders.
Let's take a look at what your test results mean:
CASE 1: You see 0 PSI on all four cylinders. That result tells you the engine has suffered one of the following conditions:
- A broken timing belt.
- A blown head gasket.
- A catastrophic internal engine failure.
Any reading that drops below 100 PSI (even if it isn't a flat 0) points to serious internal mechanical trouble.
CASE 2: The compression values from each cylinder show some variation. Up to a certain point, that can be considered normal.
If the variation stays within an acceptable range, the engine usually runs without any performance issues. Where you run into problems is when the values drift too far apart. The good thing is you can check whether the differences you wrote down point to an actual cylinder problem or not. For that explanation, head over to: Interpreting The Results Of The Engine Compression Test.
CASE 3: All four cylinders show very similar compression numbers. This is the result you hope to see.
When the compression values are close together, it confirms the engine's internals are in good shape. Since the engine is healthy, you can rule out a compression issue as the cause of the problem you're troubleshooting.
Interpreting The Results Of The Engine Compression Test
On any high-mileage engine, you can expect to see the compression numbers between cylinders vary a little bit, and that's normal. Where you start to run into real performance issues is when that variation gets too wide.
To put a number on it, you look for the lowest compression reading to stay within 15% of the highest reading you got. Once a cylinder drops below that margin, you've got a weak cylinder that will misfire.
The good news is you can confirm if that low reading is the cause of your problem by doing a quick calculation. It's nothing complicated —you can work it out with a pen and paper, or you can plug in your numbers into my online calculator here: Online Low Engine Compression Calculator. If you want to work it out yourself, here's the math:
- STEP 1: Take the highest compression reading and multiply it by 0.15 (15% in decimal form).
- STEP 2: Round the result to the nearest whole number (for example: 25.6 becomes 26).
- STEP 3: Subtract that number from your highest compression reading.
- ANSWER: The final number is the lowest compression value a cylinder can have before it's considered out of spec.
Here's an example to show you exactly how this works using real compression readings:
| Cylinder | Pressure |
|---|---|
| #1 | 175 PSI |
| #2 | 170 PSI |
| #3 | 165 PSI |
| #4 | 120 PSI |
Next, let's do a little math to find out the lowest acceptable reading:
- STEP 1: Multiply 175 by 0.15 = 26.25.
- STEP 2: Round 26.25 down to 26.
- STEP 3: Subtract 26 from 175 = 149.
- RESULT: 149 PSI is the lowest compression value this engine can be running with.
Since cylinder #4 comes up with only 120 PSI, this is the weak cylinder screwing things up and causing the misfire.
To confirm if your lowest number is within an acceptable limit, you'll do the same calculation again—only this time you plug in the highest reading from your own test instead of the sample values I used.
From here, the next step is to figure out why that cylinder's compression is low. Head over to: TEST 2: Wet Compression Test.
TEST 2: Wet Compression Test
")
Most of the time, when you see a cylinder with low or even 0 PSI, it's usually one of two things going on:
- The piston rings are worn and do not seal anymore.
- The cylinder head valves are worn or damaged and let compression escape.
The good news is you don't have to start tearing the engine apart to figure out which one it is. You can find out by doing a wet compression test.
This simply involves adding a little engine oil into the cylinder that showed the low (or 0) PSI, then run the compression test again. One of two things will happen:
- Compression shoots up: That tells you the piston rings in that cylinder are causing the issue.
- Compression stays flat (no change): That points to the intake or exhaust valves as the source of the problem.
Alright, let's get to it.
- 1
Add a tablespoon (or two) of engine oil in the cylinder you need to retest.
I suggest using a small and long funnel so that the oil will reach the inside of the cylinder. - 2
Once you've added the oil, install the compression gauge, and as before just hand tighten it.
- 3
Now, have your helper crank the engine till the needle stops climbing on the compression gauge.
- 4
You'll see one of two results:
1.) The needle will climb higher than the previous compression number you recorded for this specific cylinder.
2.) The needle will not move at all or stay at the same number you recorded earlier.
Whatever value your compression tester reads, write it down again. - 5
If you have another cylinder that needs to be tested, repeat steps 1 thru' 4 on it now.
Let's go over what your test results mean:
CASE 1: The compression reading climbed higher (in the low or 0 PSI cylinder). This tells you that the low number you saw in the dry compression test (TEST 1) is coming from worn piston rings.
The reason the reading jumps is because the motor oil you poured in is helping those rings seal tighter against the cylinder wall. You only get this kind of rise when piston ring wear is the culprit.
CASE 2: The compression reading DID NOT climb (it stayed the same). This tells you the low or 0 PSI result you saw earlier is being caused by intake or exhaust valves in the cylinder head that are worn or damaged and not sealing the way they should.
More 1.9L Ford Escort And Mercury Tracer Diagnostic Tutorials
You can find a complete list of 1.9L Ford Escort and Mercury Tracer tutorials in this index:
Here's a small sample of the tutorials you'll find in the index:
- How To Test The MAF Sensor (1991-1995 1.9L Ford Escort, Mercury Tracer).
- How To Test The Fuel Pump (1991-1996 1.9L Ford Escort, Mercury Tracer).
- Common Causes Of Spark Plug Failure (1991-1995 1.9L Ford Escort, Mercury Tracer).
- How To Test For A Blown Head Gasket (1991-1995 1.9L Ford Escort, Mercury Tracer).

If this info saved the day, buy me a beer!
